One of the many functions I hold within the Little League Organization in our town is running the annual fundraising dance. Since the purpose of this event is to get the parents together for a night of fun, it is also ultimately to raise money for the league. Because of this, I am always looking for easy, but economical – OK, OK, I’ll say it – CHEAP decorations. This event is held on the back deck of the clubhouse of a golf course in town. They have a huge covered deck that is perfect for holding 200+ people outside, but is covered in case of inclement weather.
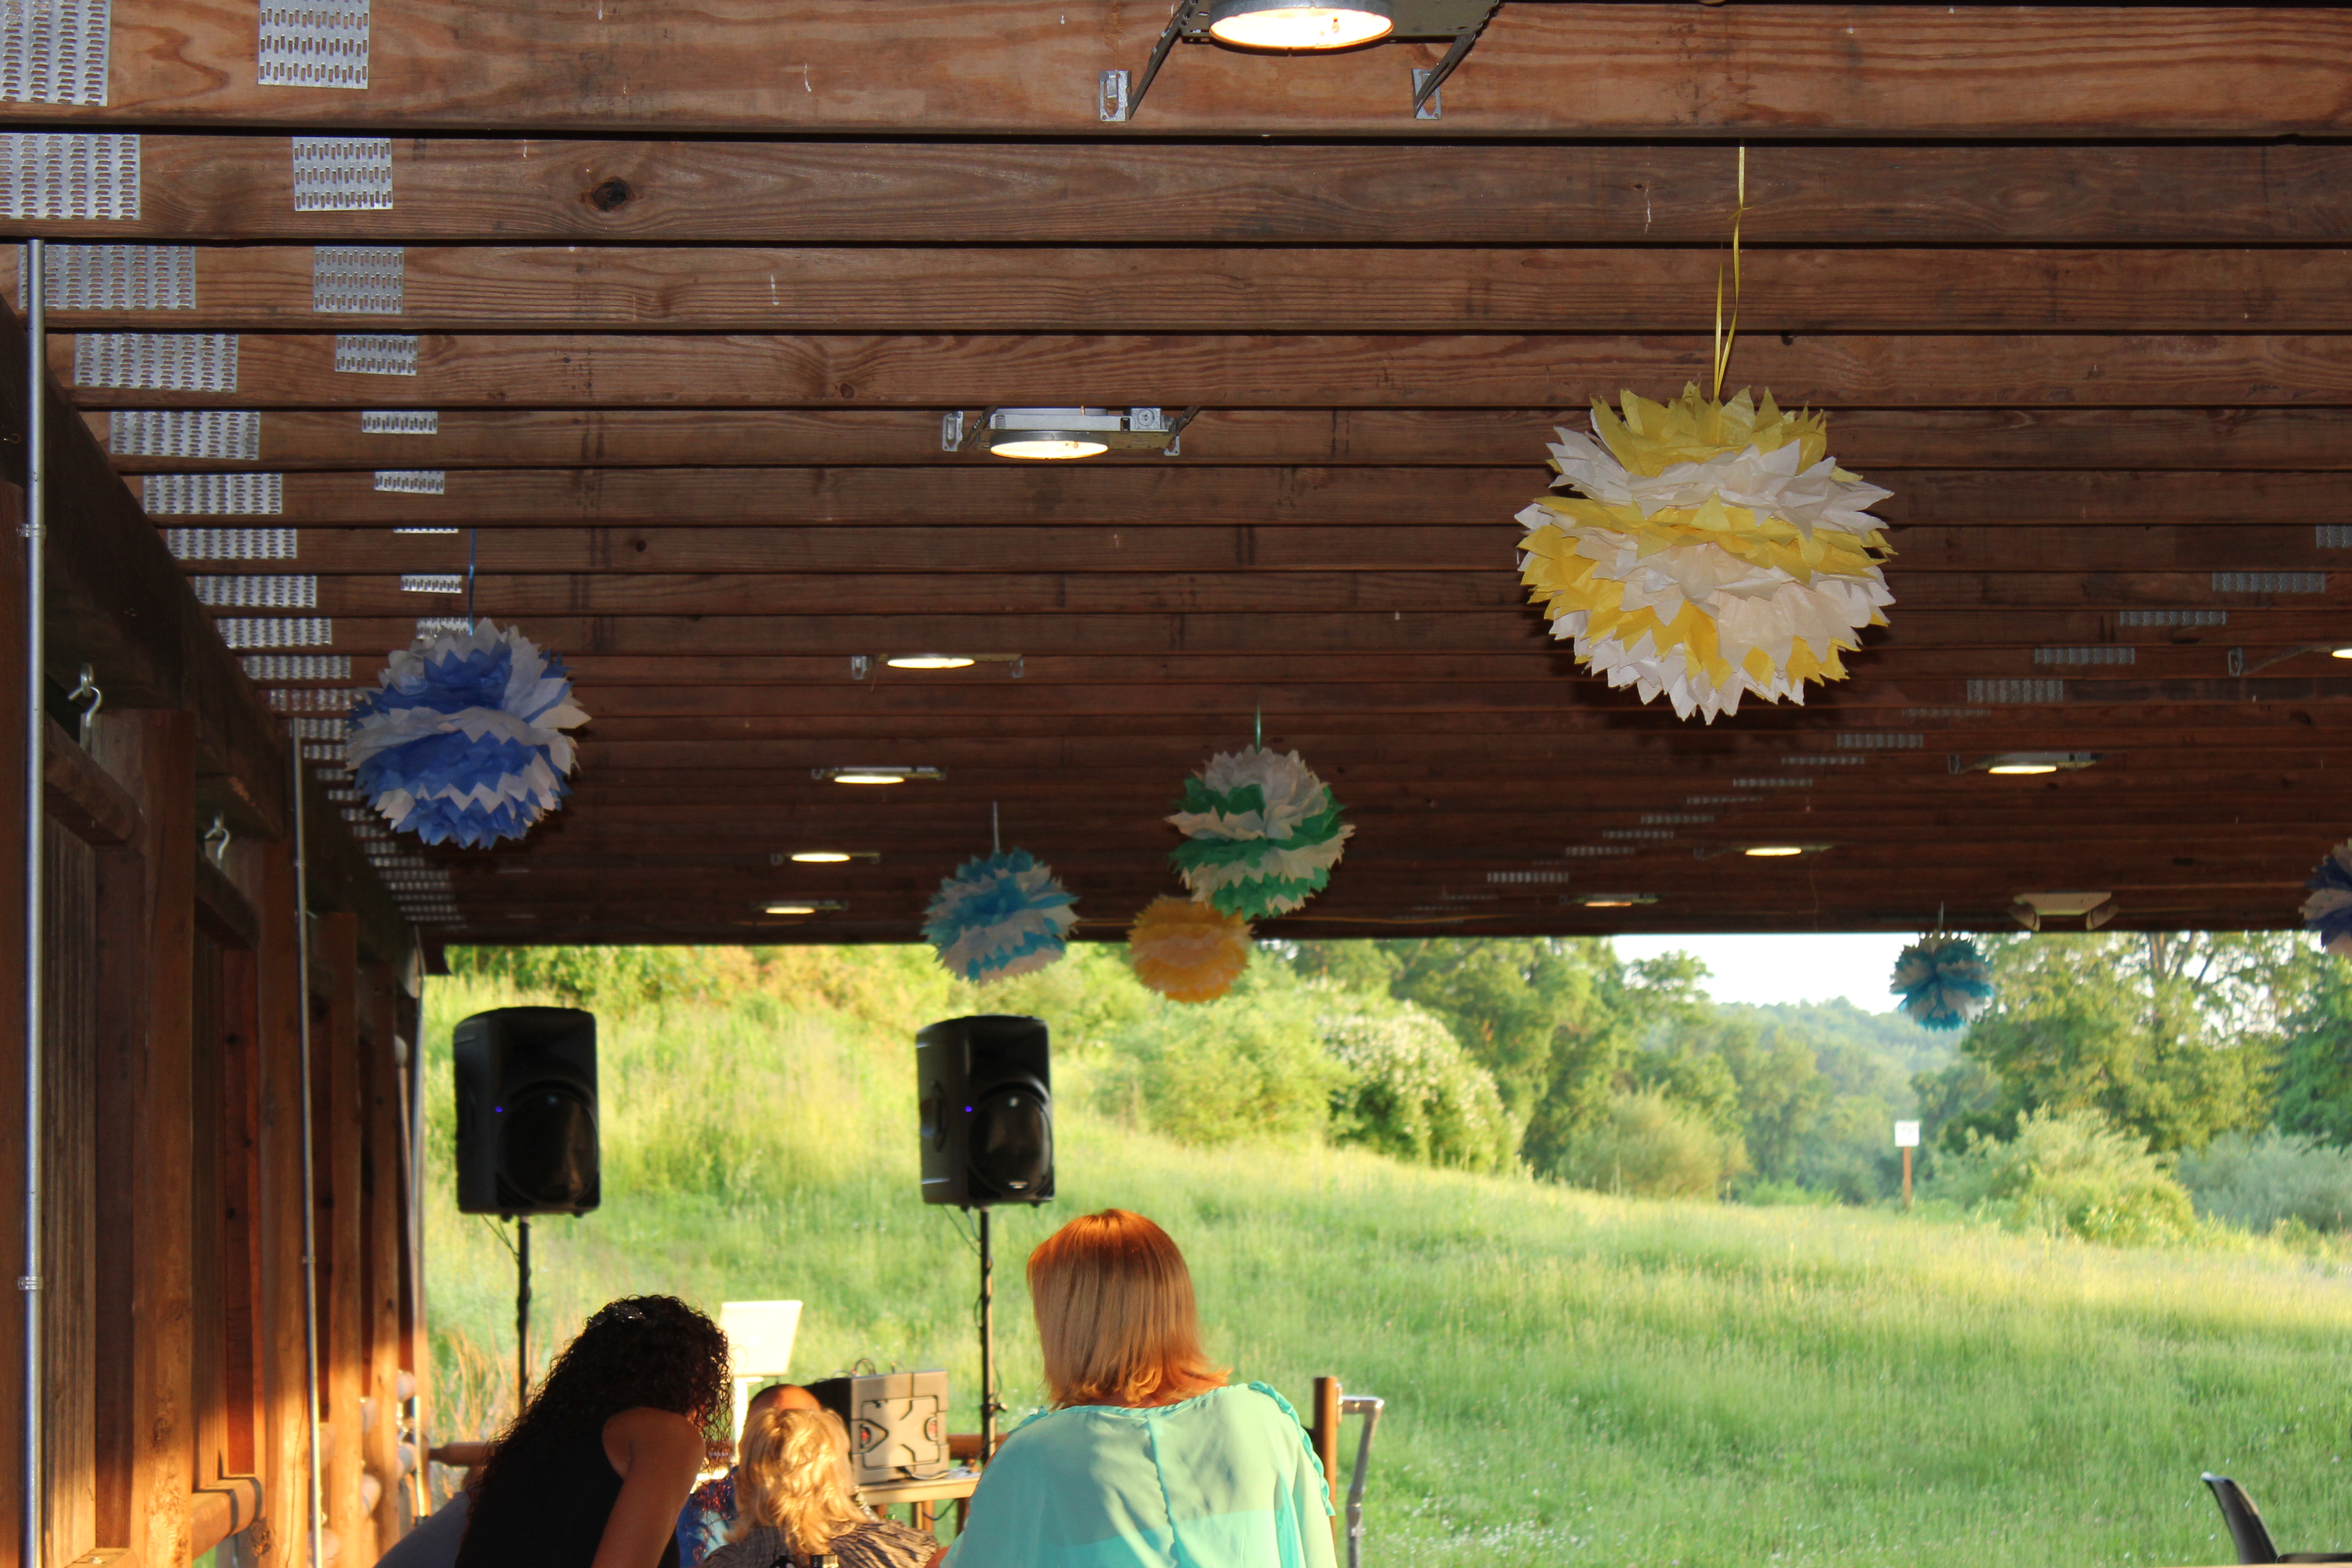
This year, the decorating committee – all 2 of us – decided to make paper Poms out of tissue paper. Here’s how you can make them for any event you may be having.


Supplies Needed:
- 12 pieces of tissue paper – one color or multiple colors – cut into 18“ x 20” sections (or whatever size you’d like, just not a square as that’s the most difficult to manipulate into a full Pom).
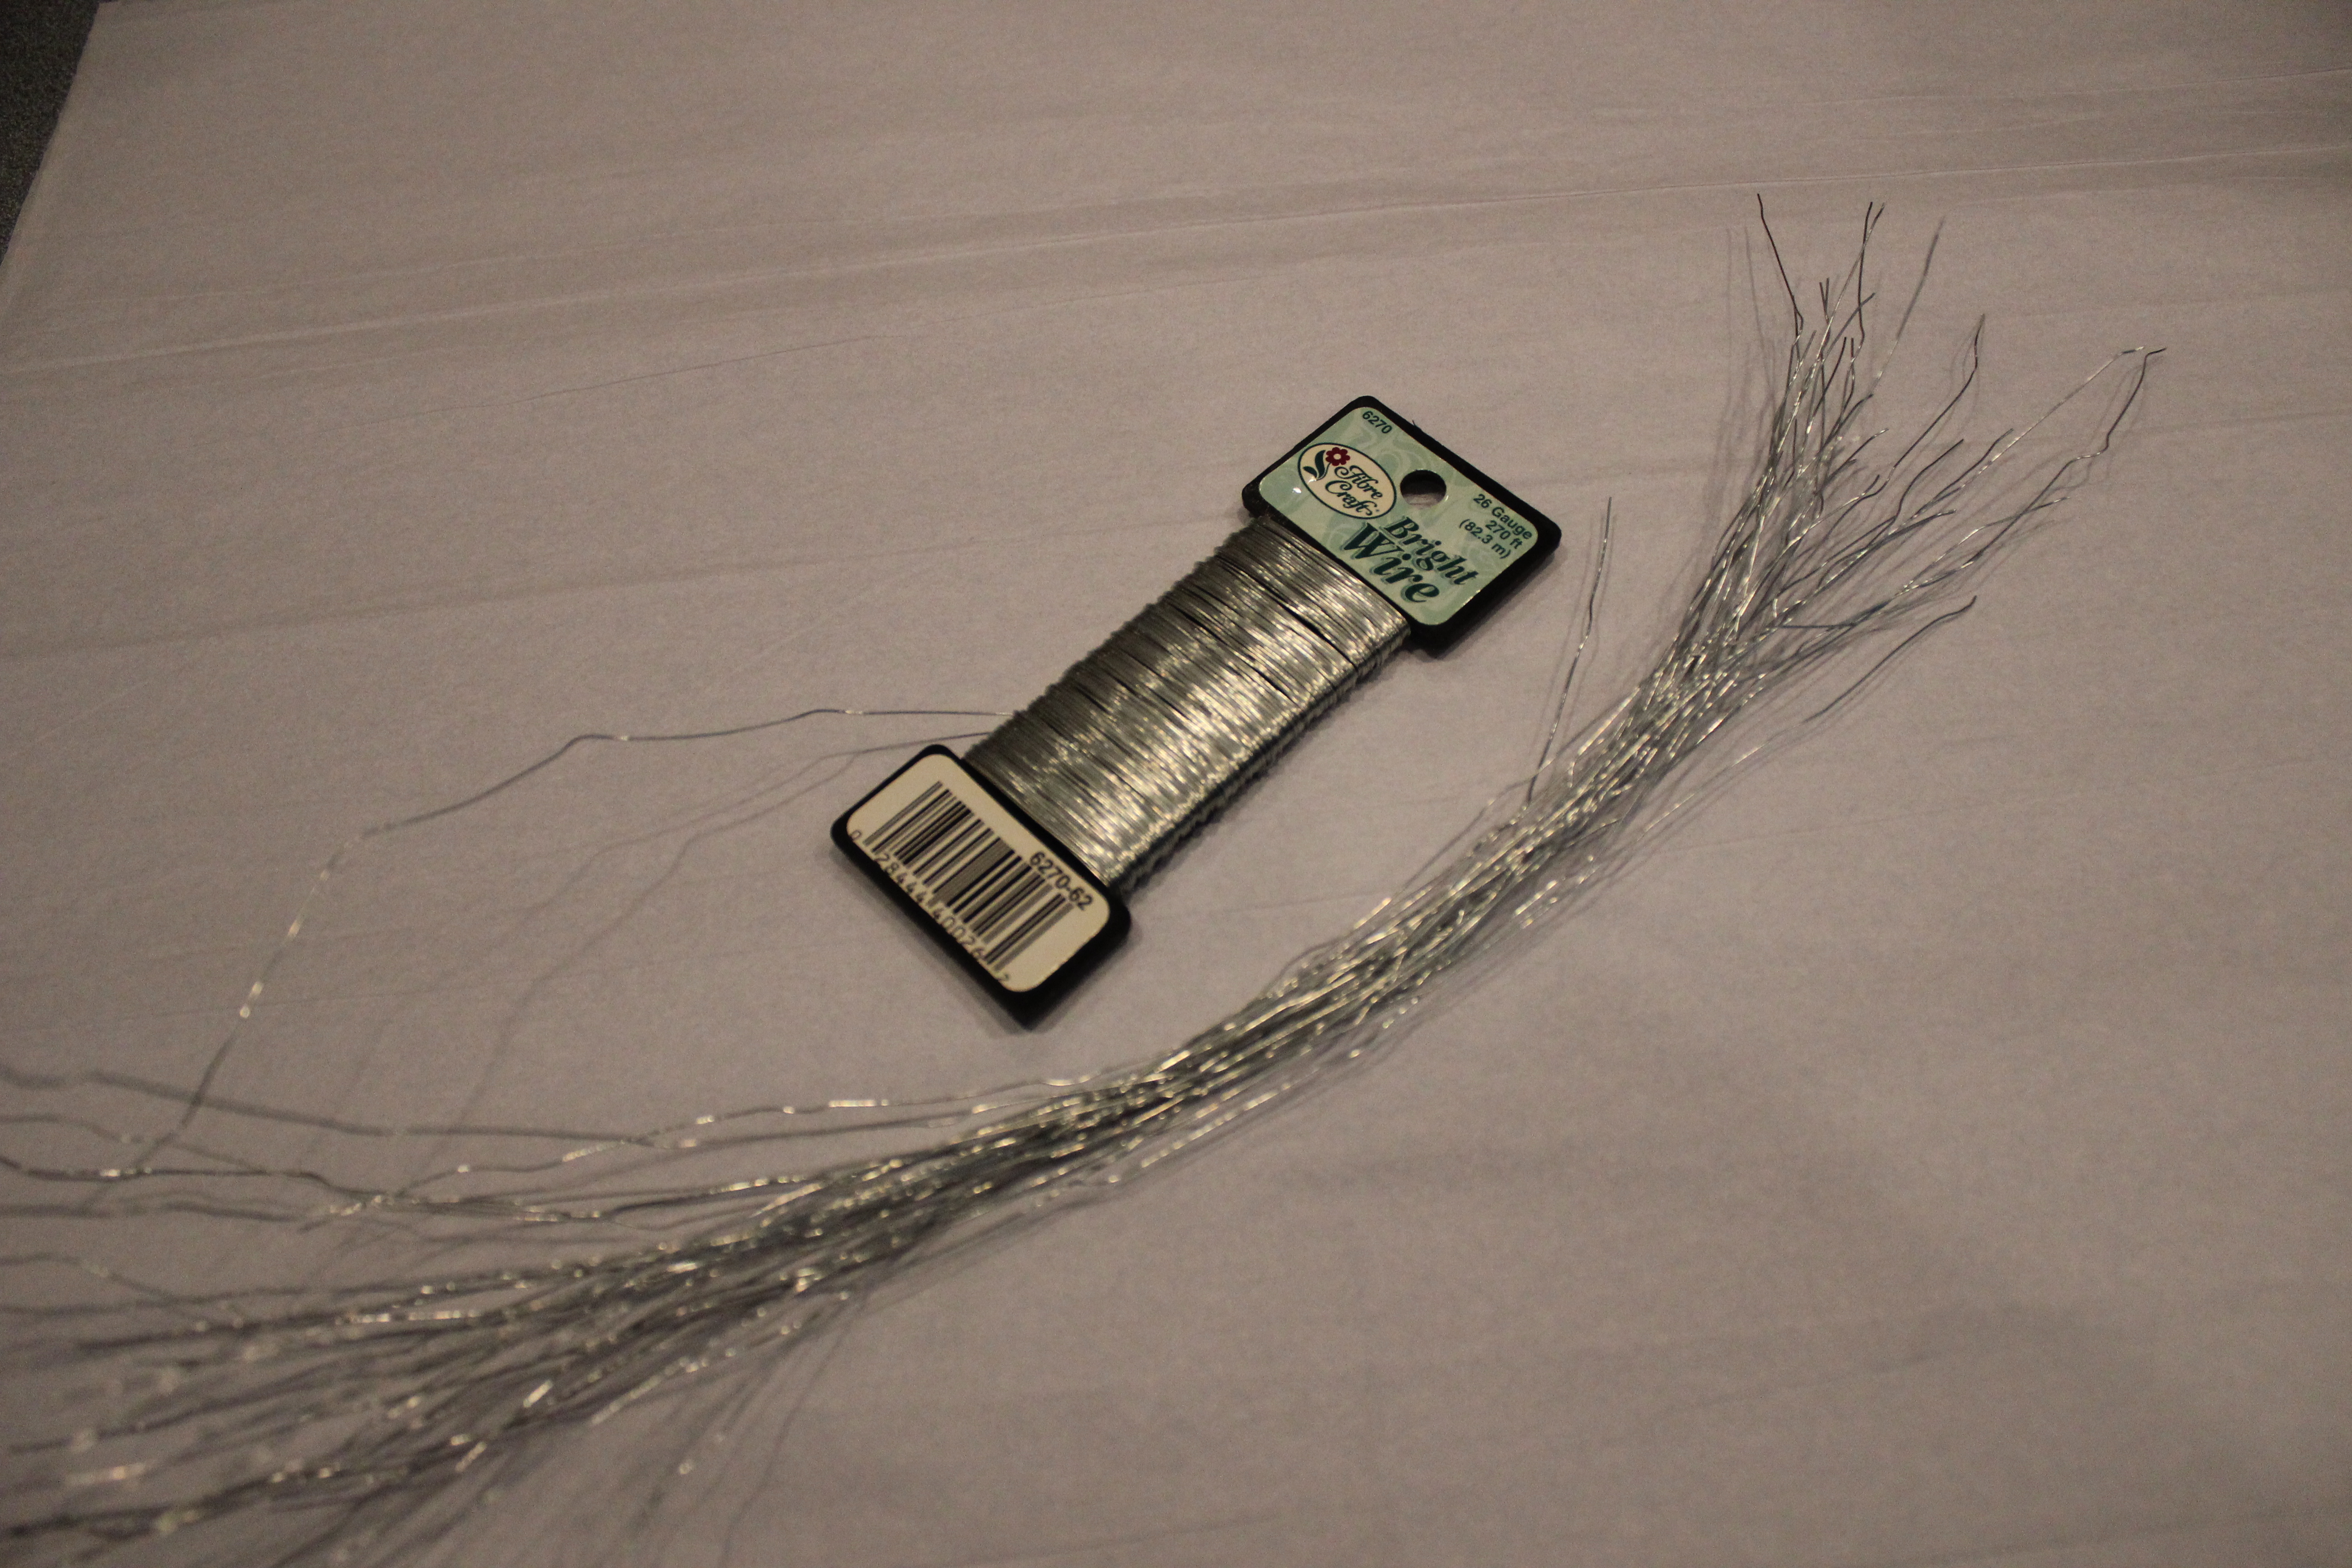
- Floral wire (cut into 10” – 12” lengths)
- Curling Ribbon (ours was cut at a 72” length – depending on where your Pom will be hung, you can make this ribbon longer or shorter. If you aren’t sure what length you will need, you are better off to leave the ribbon on the longer side.)

What To Do to Make the Pom Pictured Above:
Step1: Alternate two pieces of colored paper with 2 pieces of white paper – for a total of 12 pieces of tissue paper.
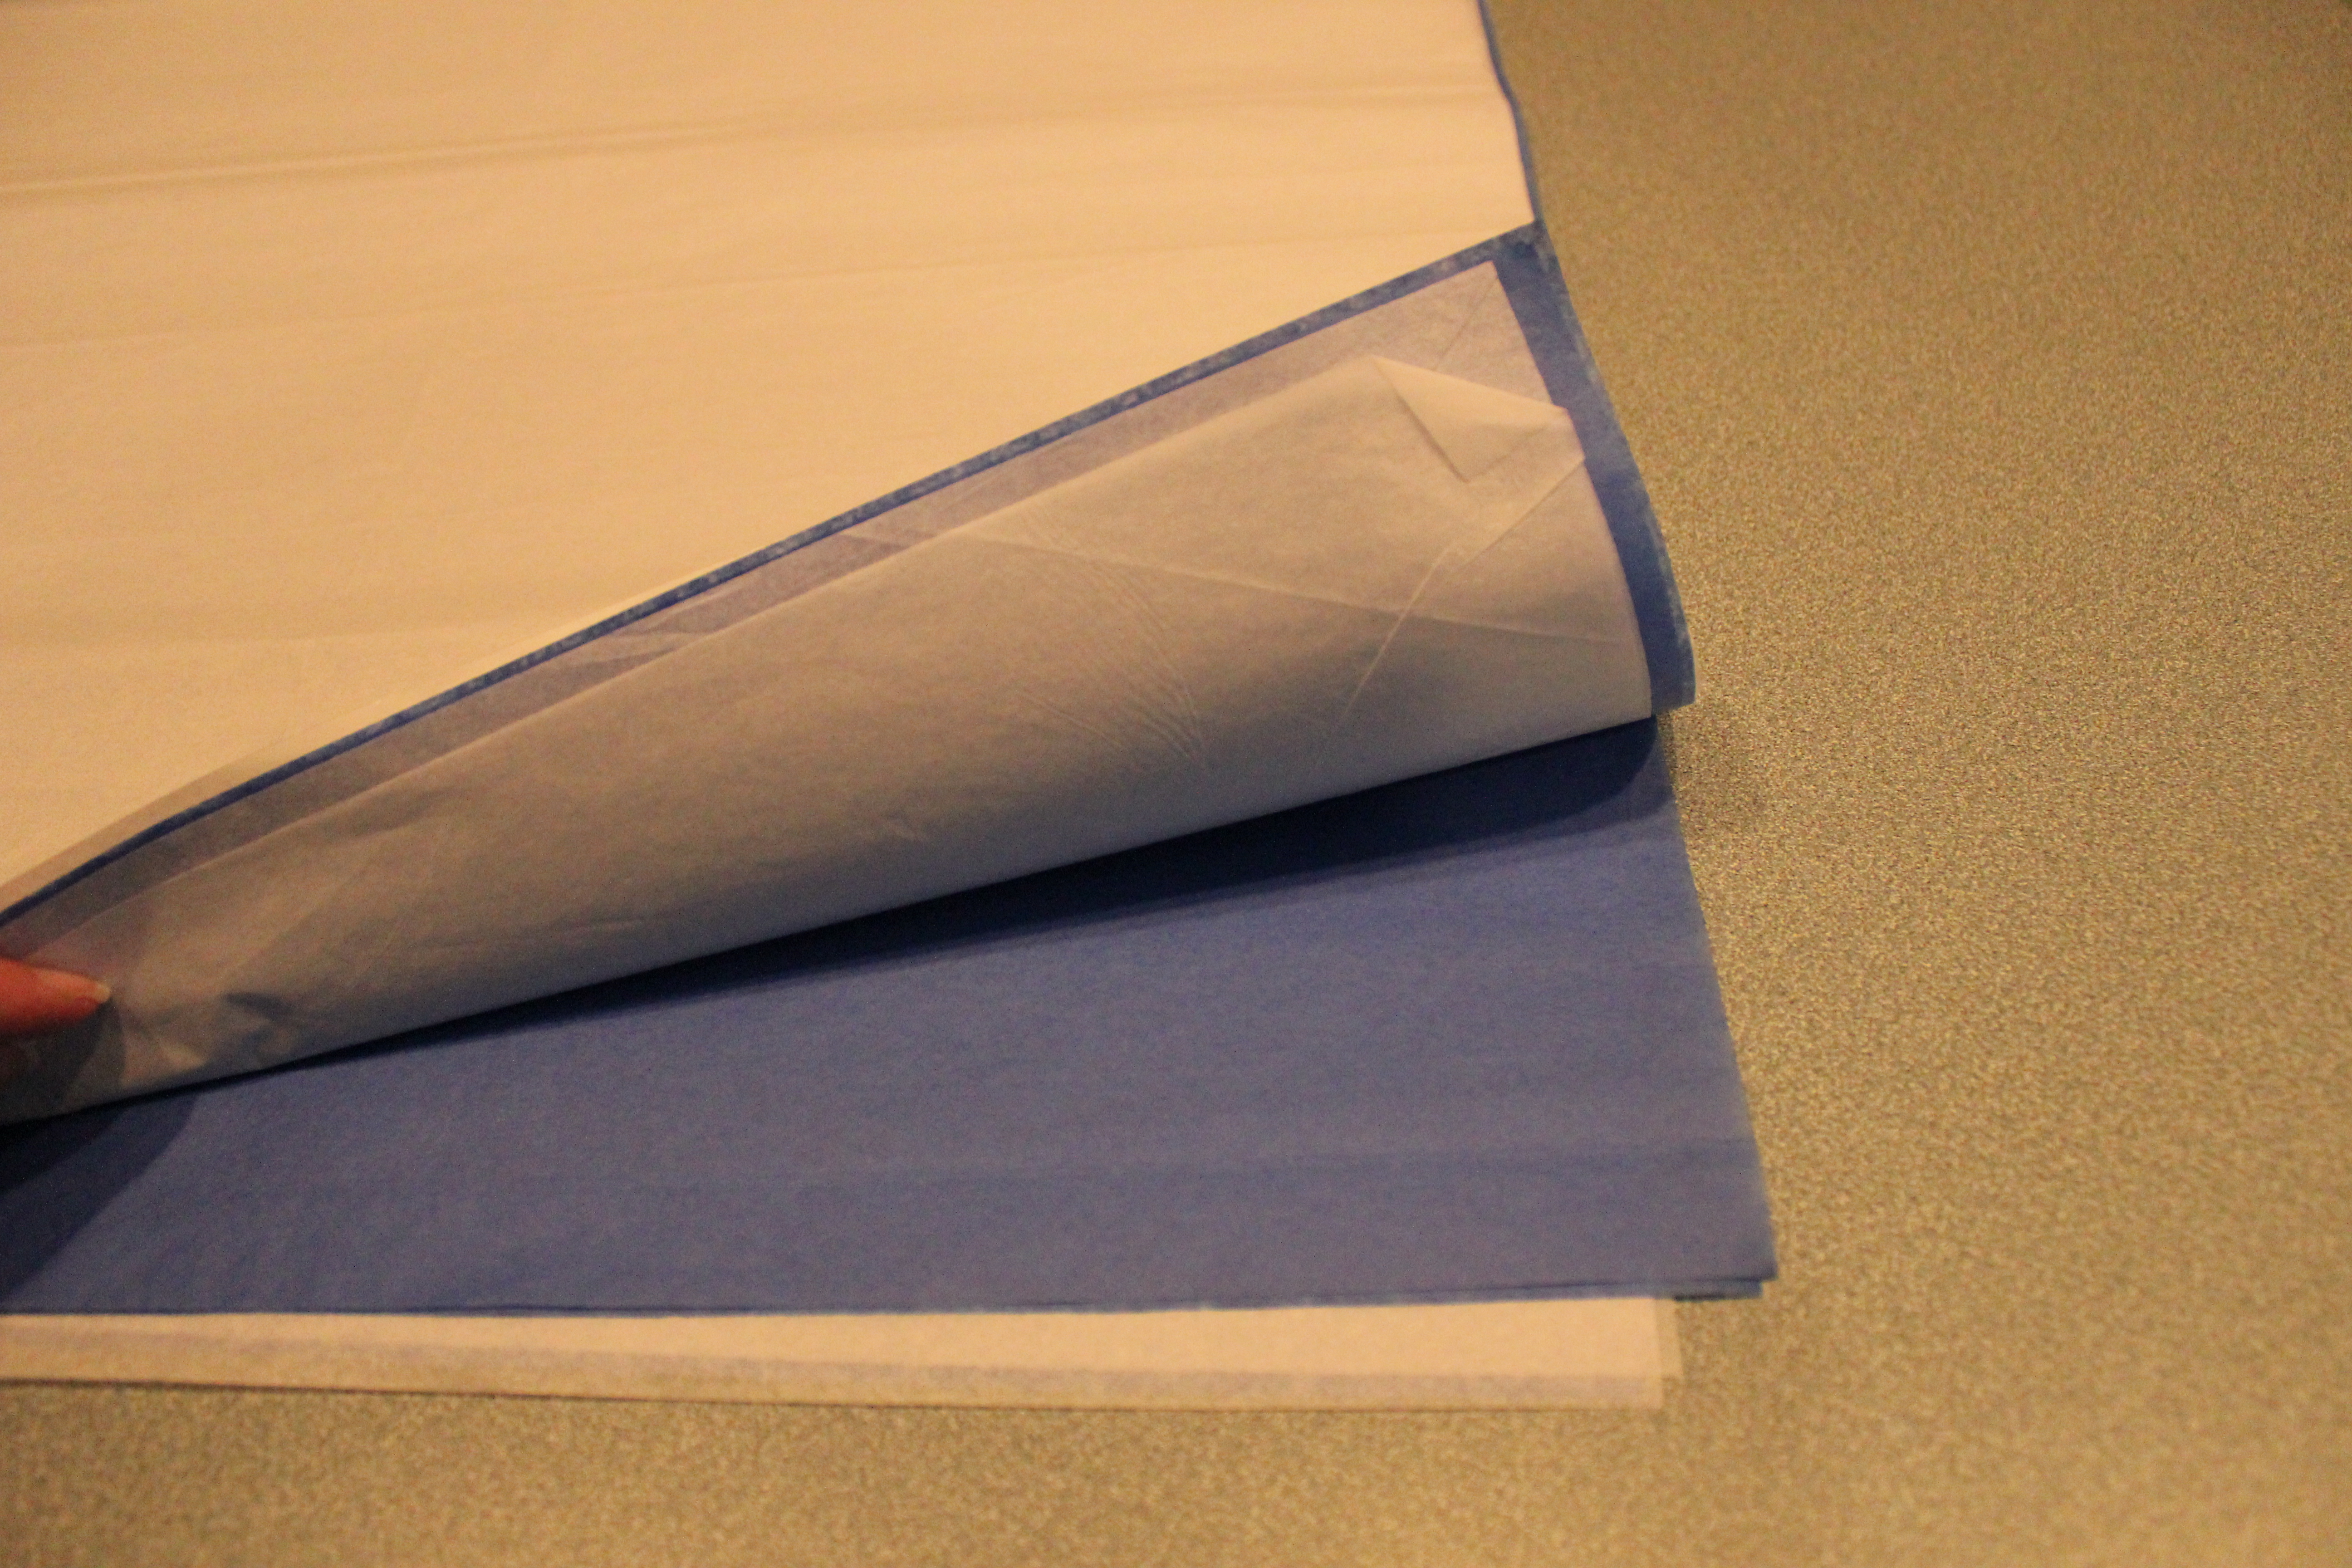
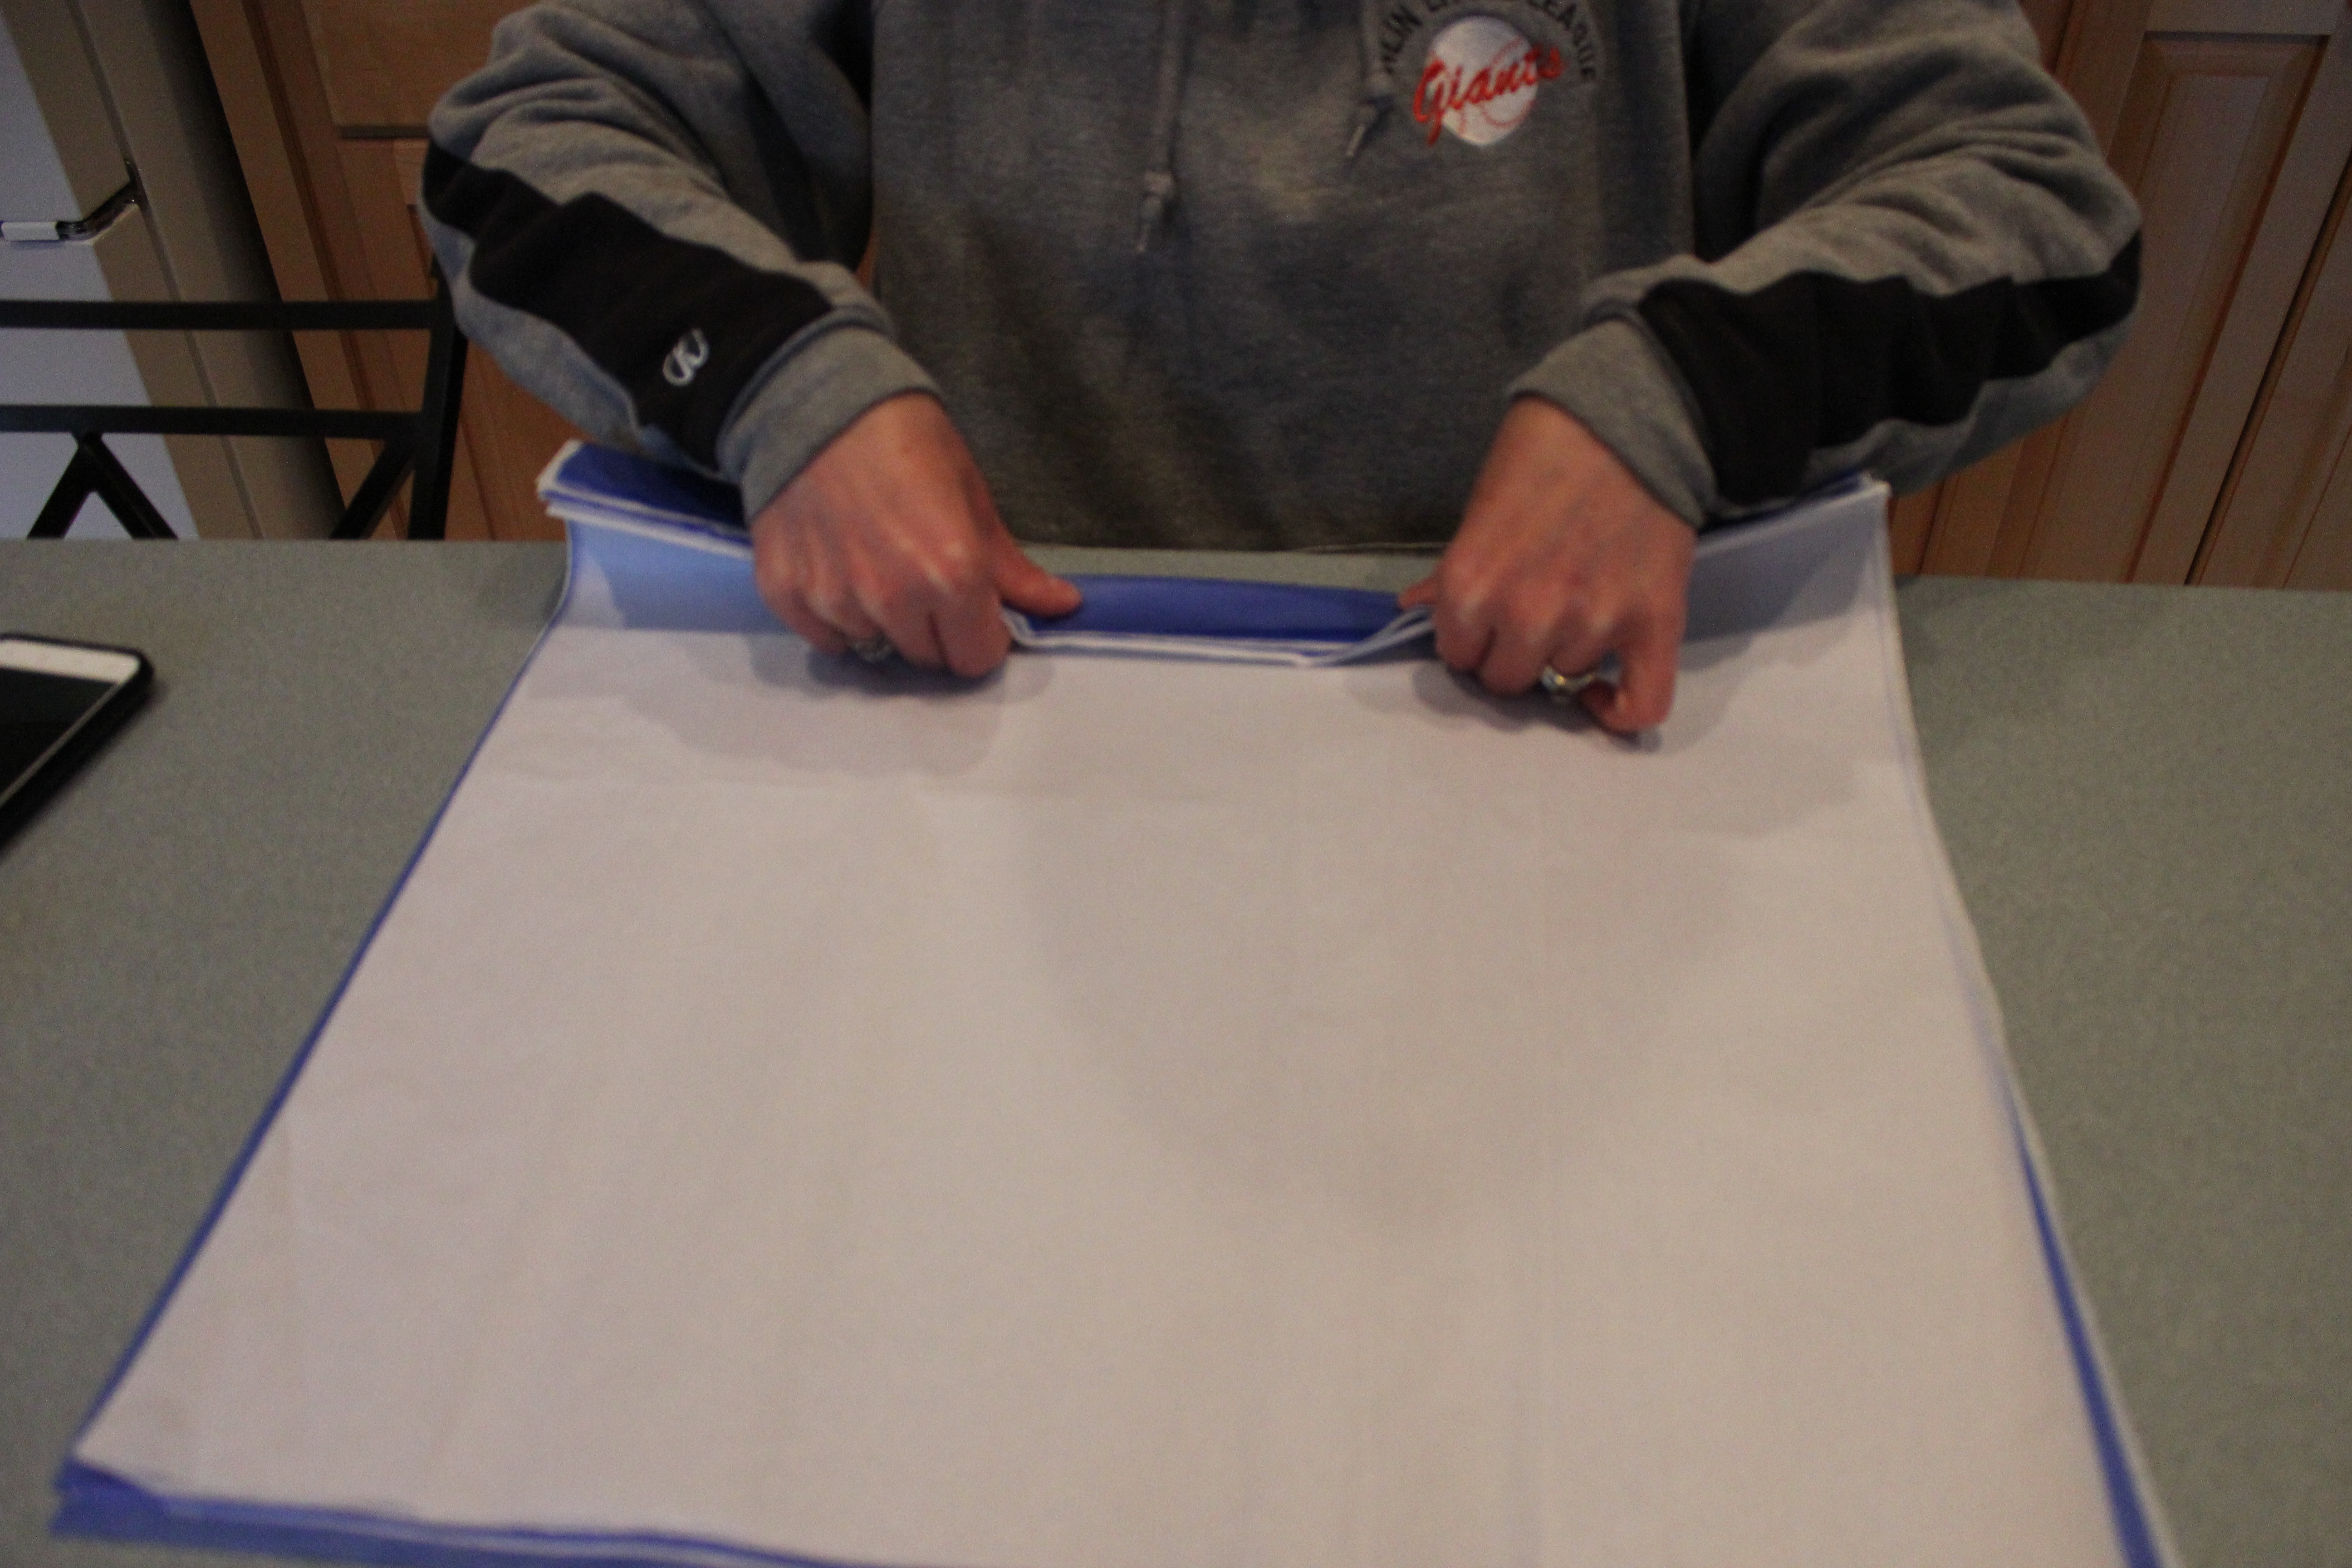
Step 2: With the shorter side of the tissue paper facing you, fold ‘accordion style’ in approximately 1 ¾” inch widths. The tissue paper we had was uneven at the edges so the accordion fan you end up with will not be perfect.
Step 3: Take a length of floral wire and twist it around the center of the tissue paper to secure the tissue paper. Do not ‘crunch’ the paper in the center – the floral wire is only there to make sure the accordion doesn’t come apart.
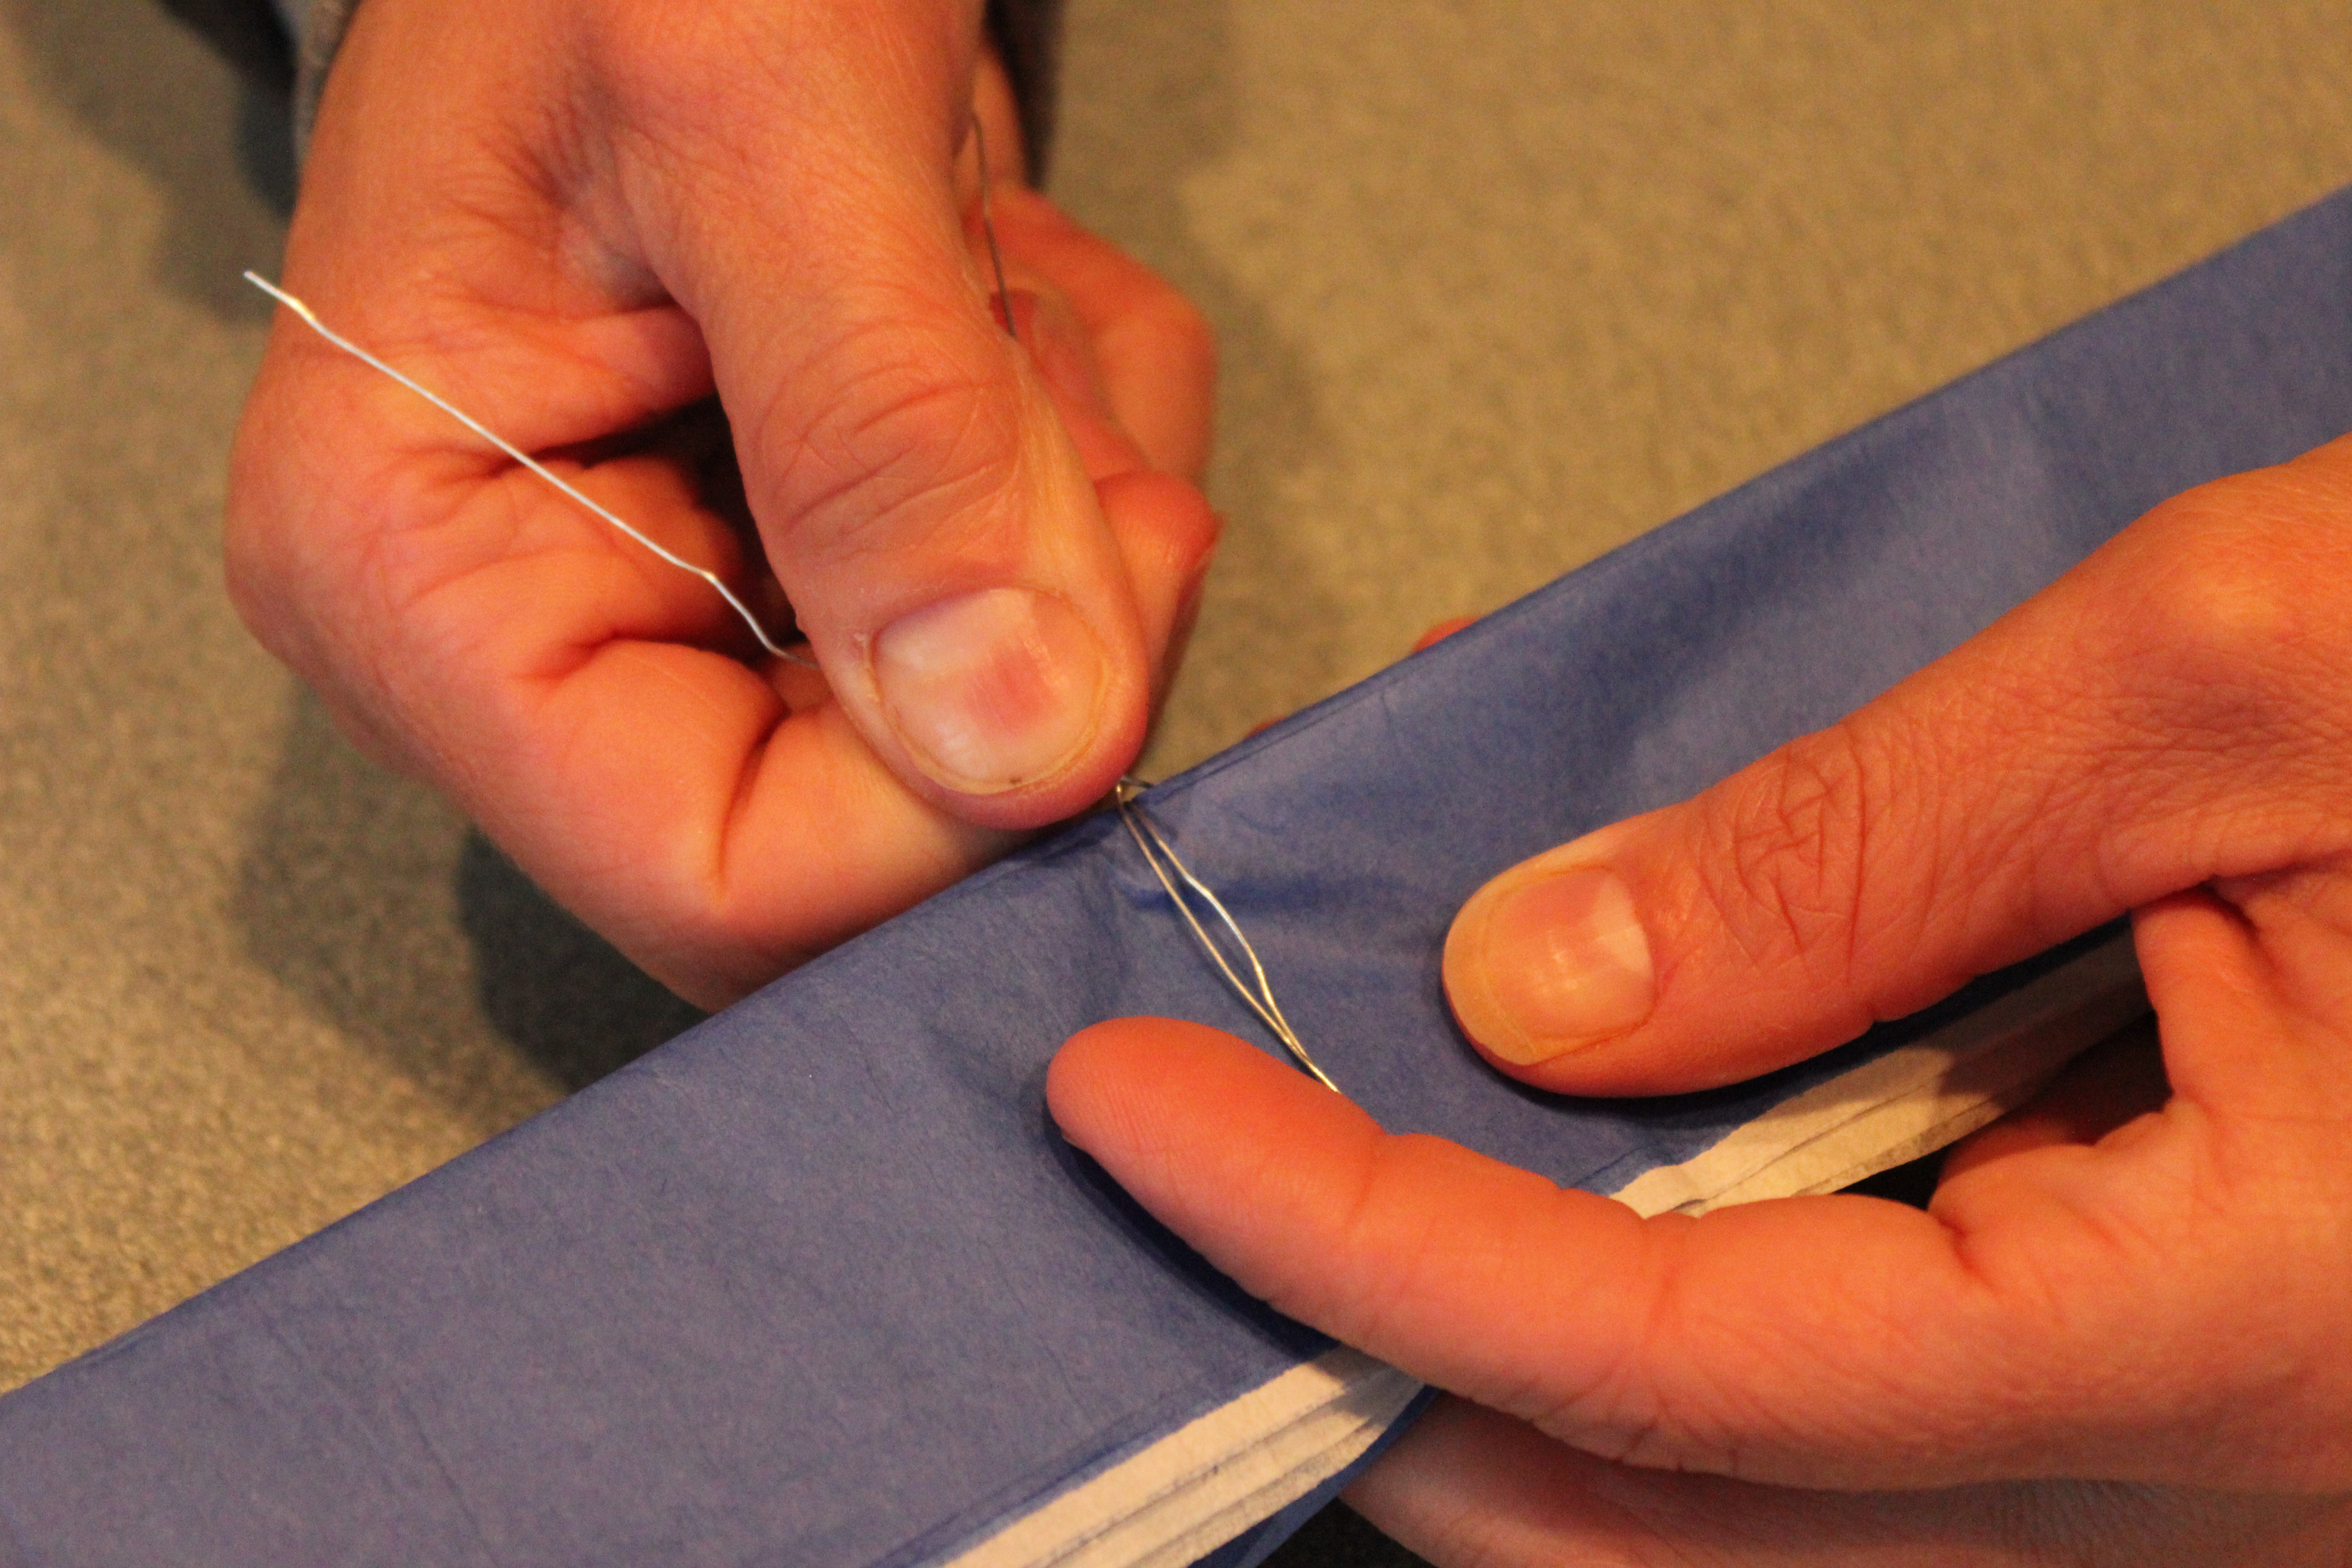

Step 4: Thread the length of curling ribbon through the floral wire wrapped around the center of the Pom. There is no need to knot this ribbon so it stays in place. Since we were transporting the Poms to a different location and then fluffing them, we did choose to put a quick knot to be sure the ribbon didn’t slip out during transit.

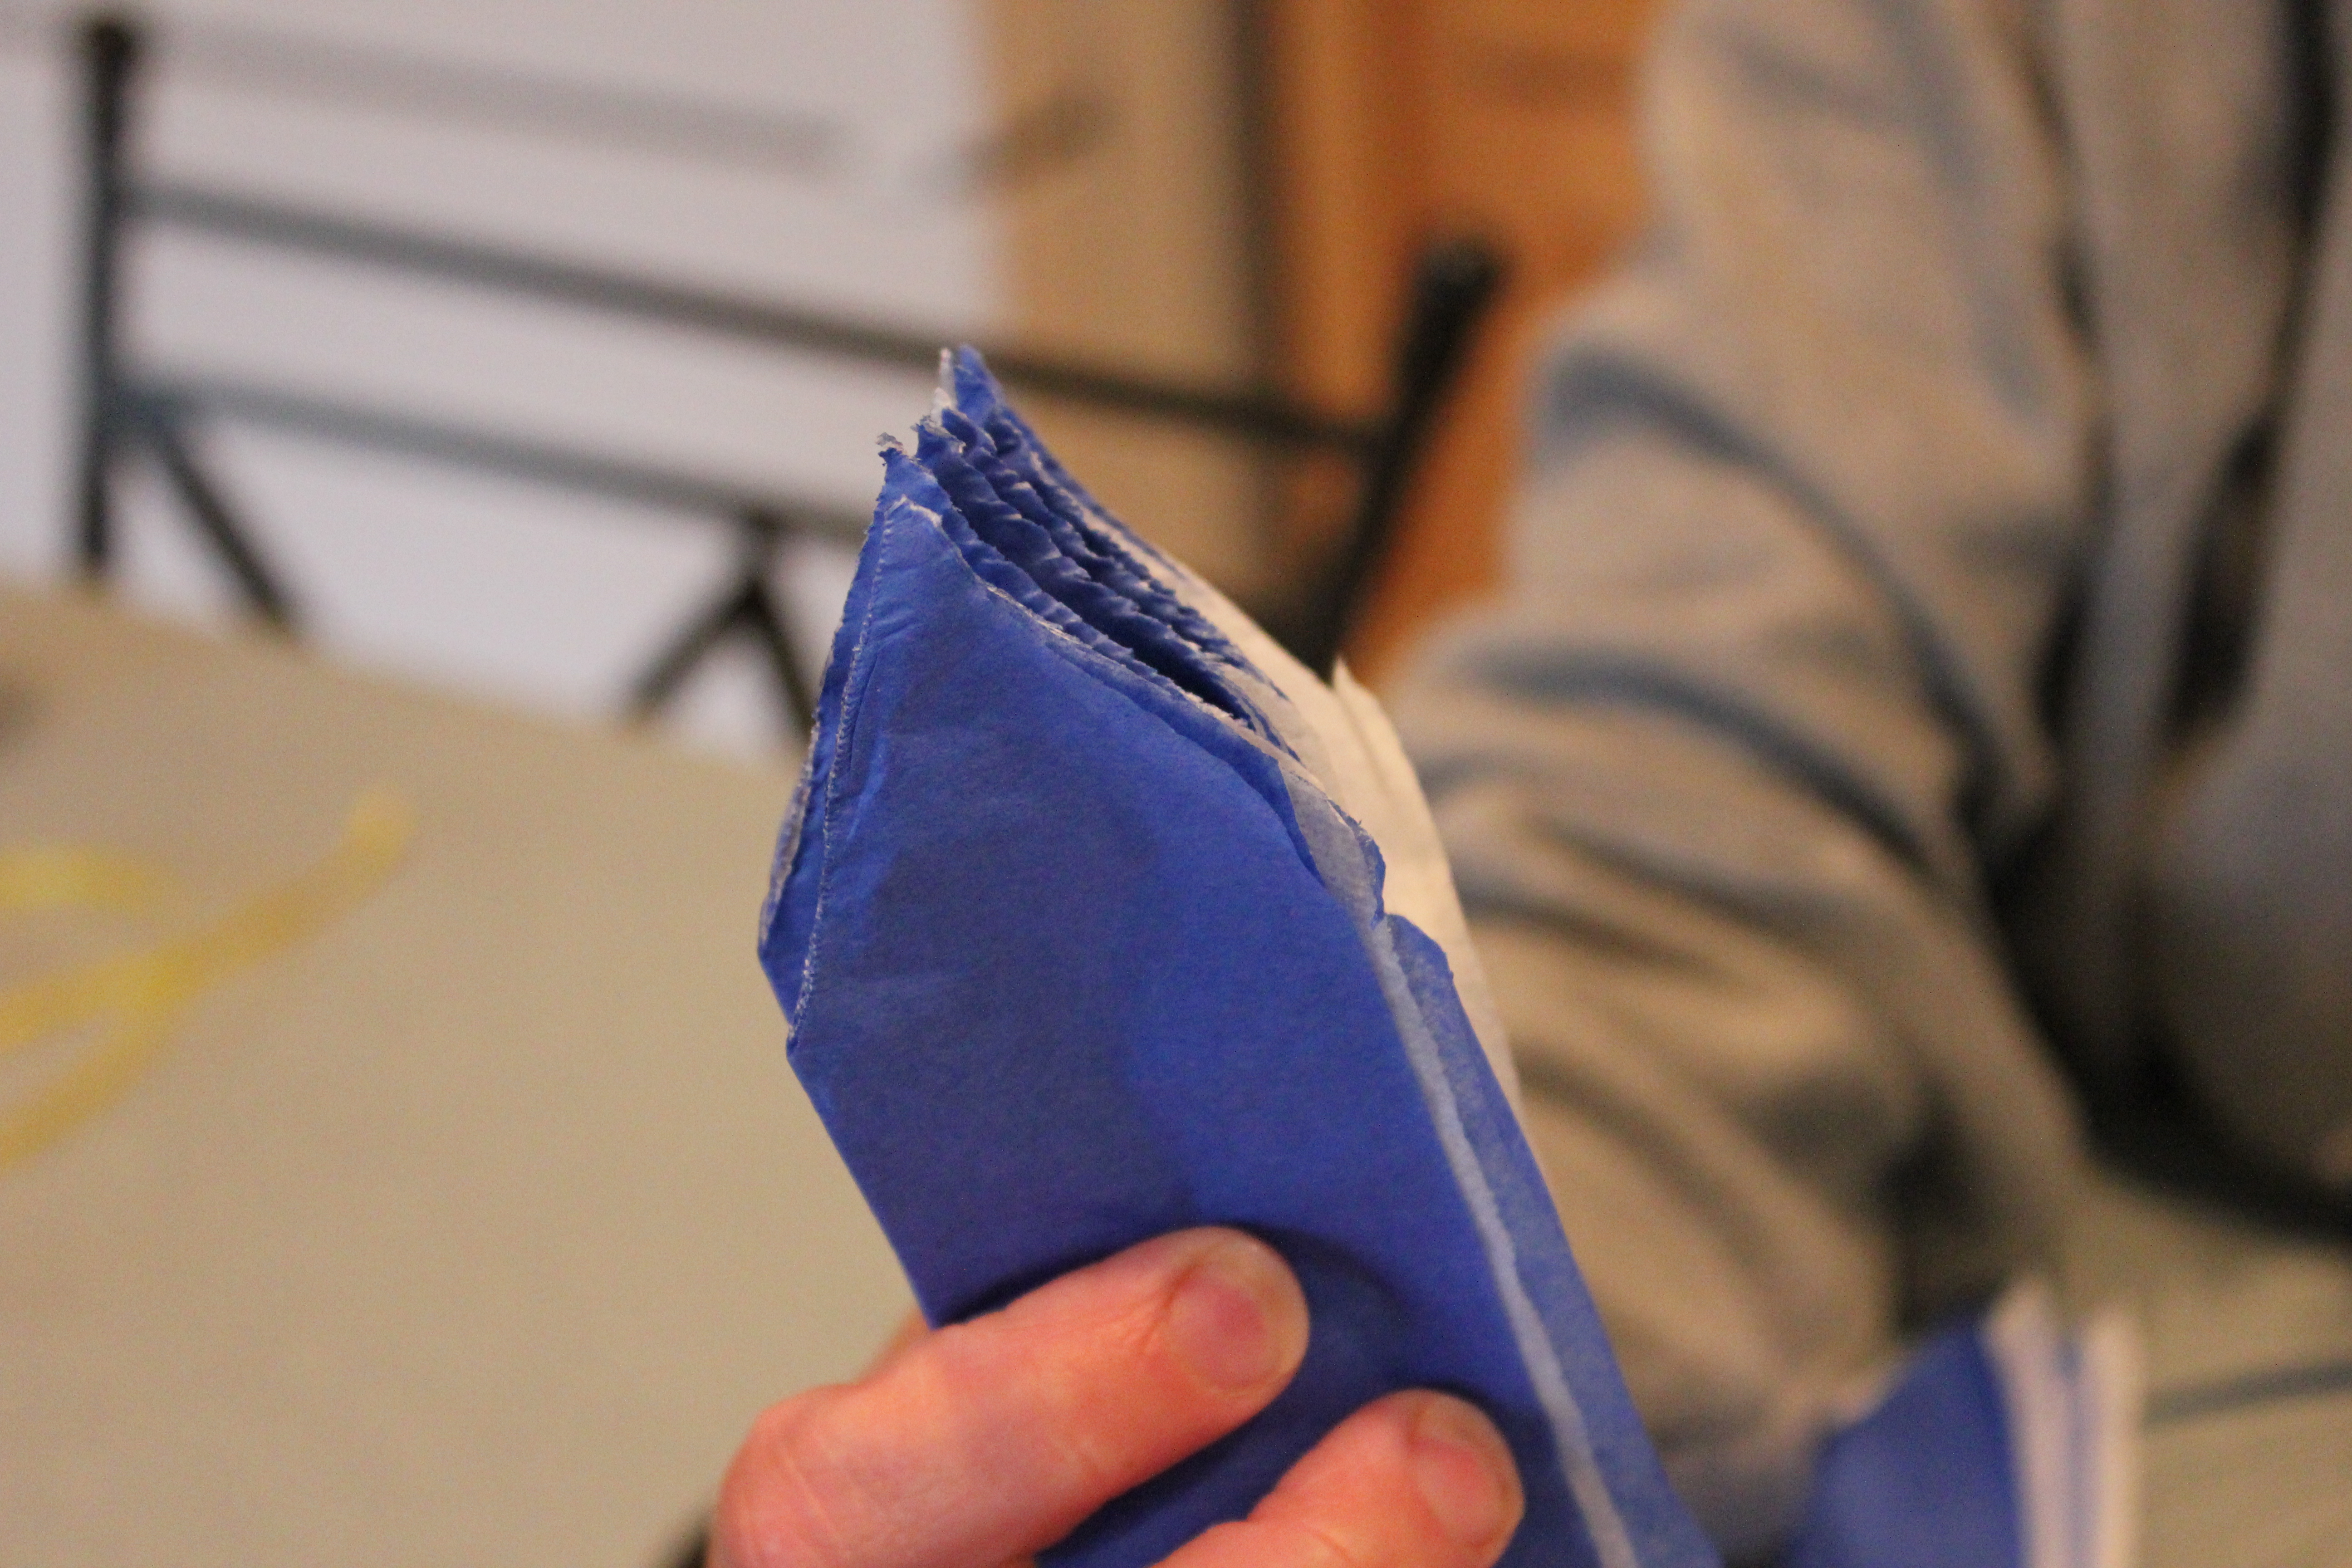
Step 5: Trim the ends of the tissue paper. We cut ours into a triangle, but you can make your edges rounded for a softer look. You need a good sturdy scissors to trim this since you are cutting 12 pieces of tissue paper that have been folded over many times… With a triangle shape you can just start from the edge and trim to the middle on both sides using straight cuts. With a round edge, you need to be careful that you can trim evenly around the end of the Pom. Trimming the edges makes the Pom appear ‘fuller’ by adding dimension to the edges.

This is where we stopped for the majority of the Poms until the day of our event. We chose to transport them flat to the venue and were going to “fluff” them that day. If you manipulate these Poms too much, like moving them from location to location before hanging, they will actually flatten out – especially if you can’t suspend them from the ribbon right away…

Step 6: Open the accordion fold on one side of the floral wire and make it look like a fan. Carefully fluff the Pom by separating each layer upward for ½ of the layers in your Pom. Tip – to get the fullest Poms, you will need to gently work to separate the layers of tissue paper right near the center – near the floral wire. You may need to play with these layers a little bit to separate the layers.
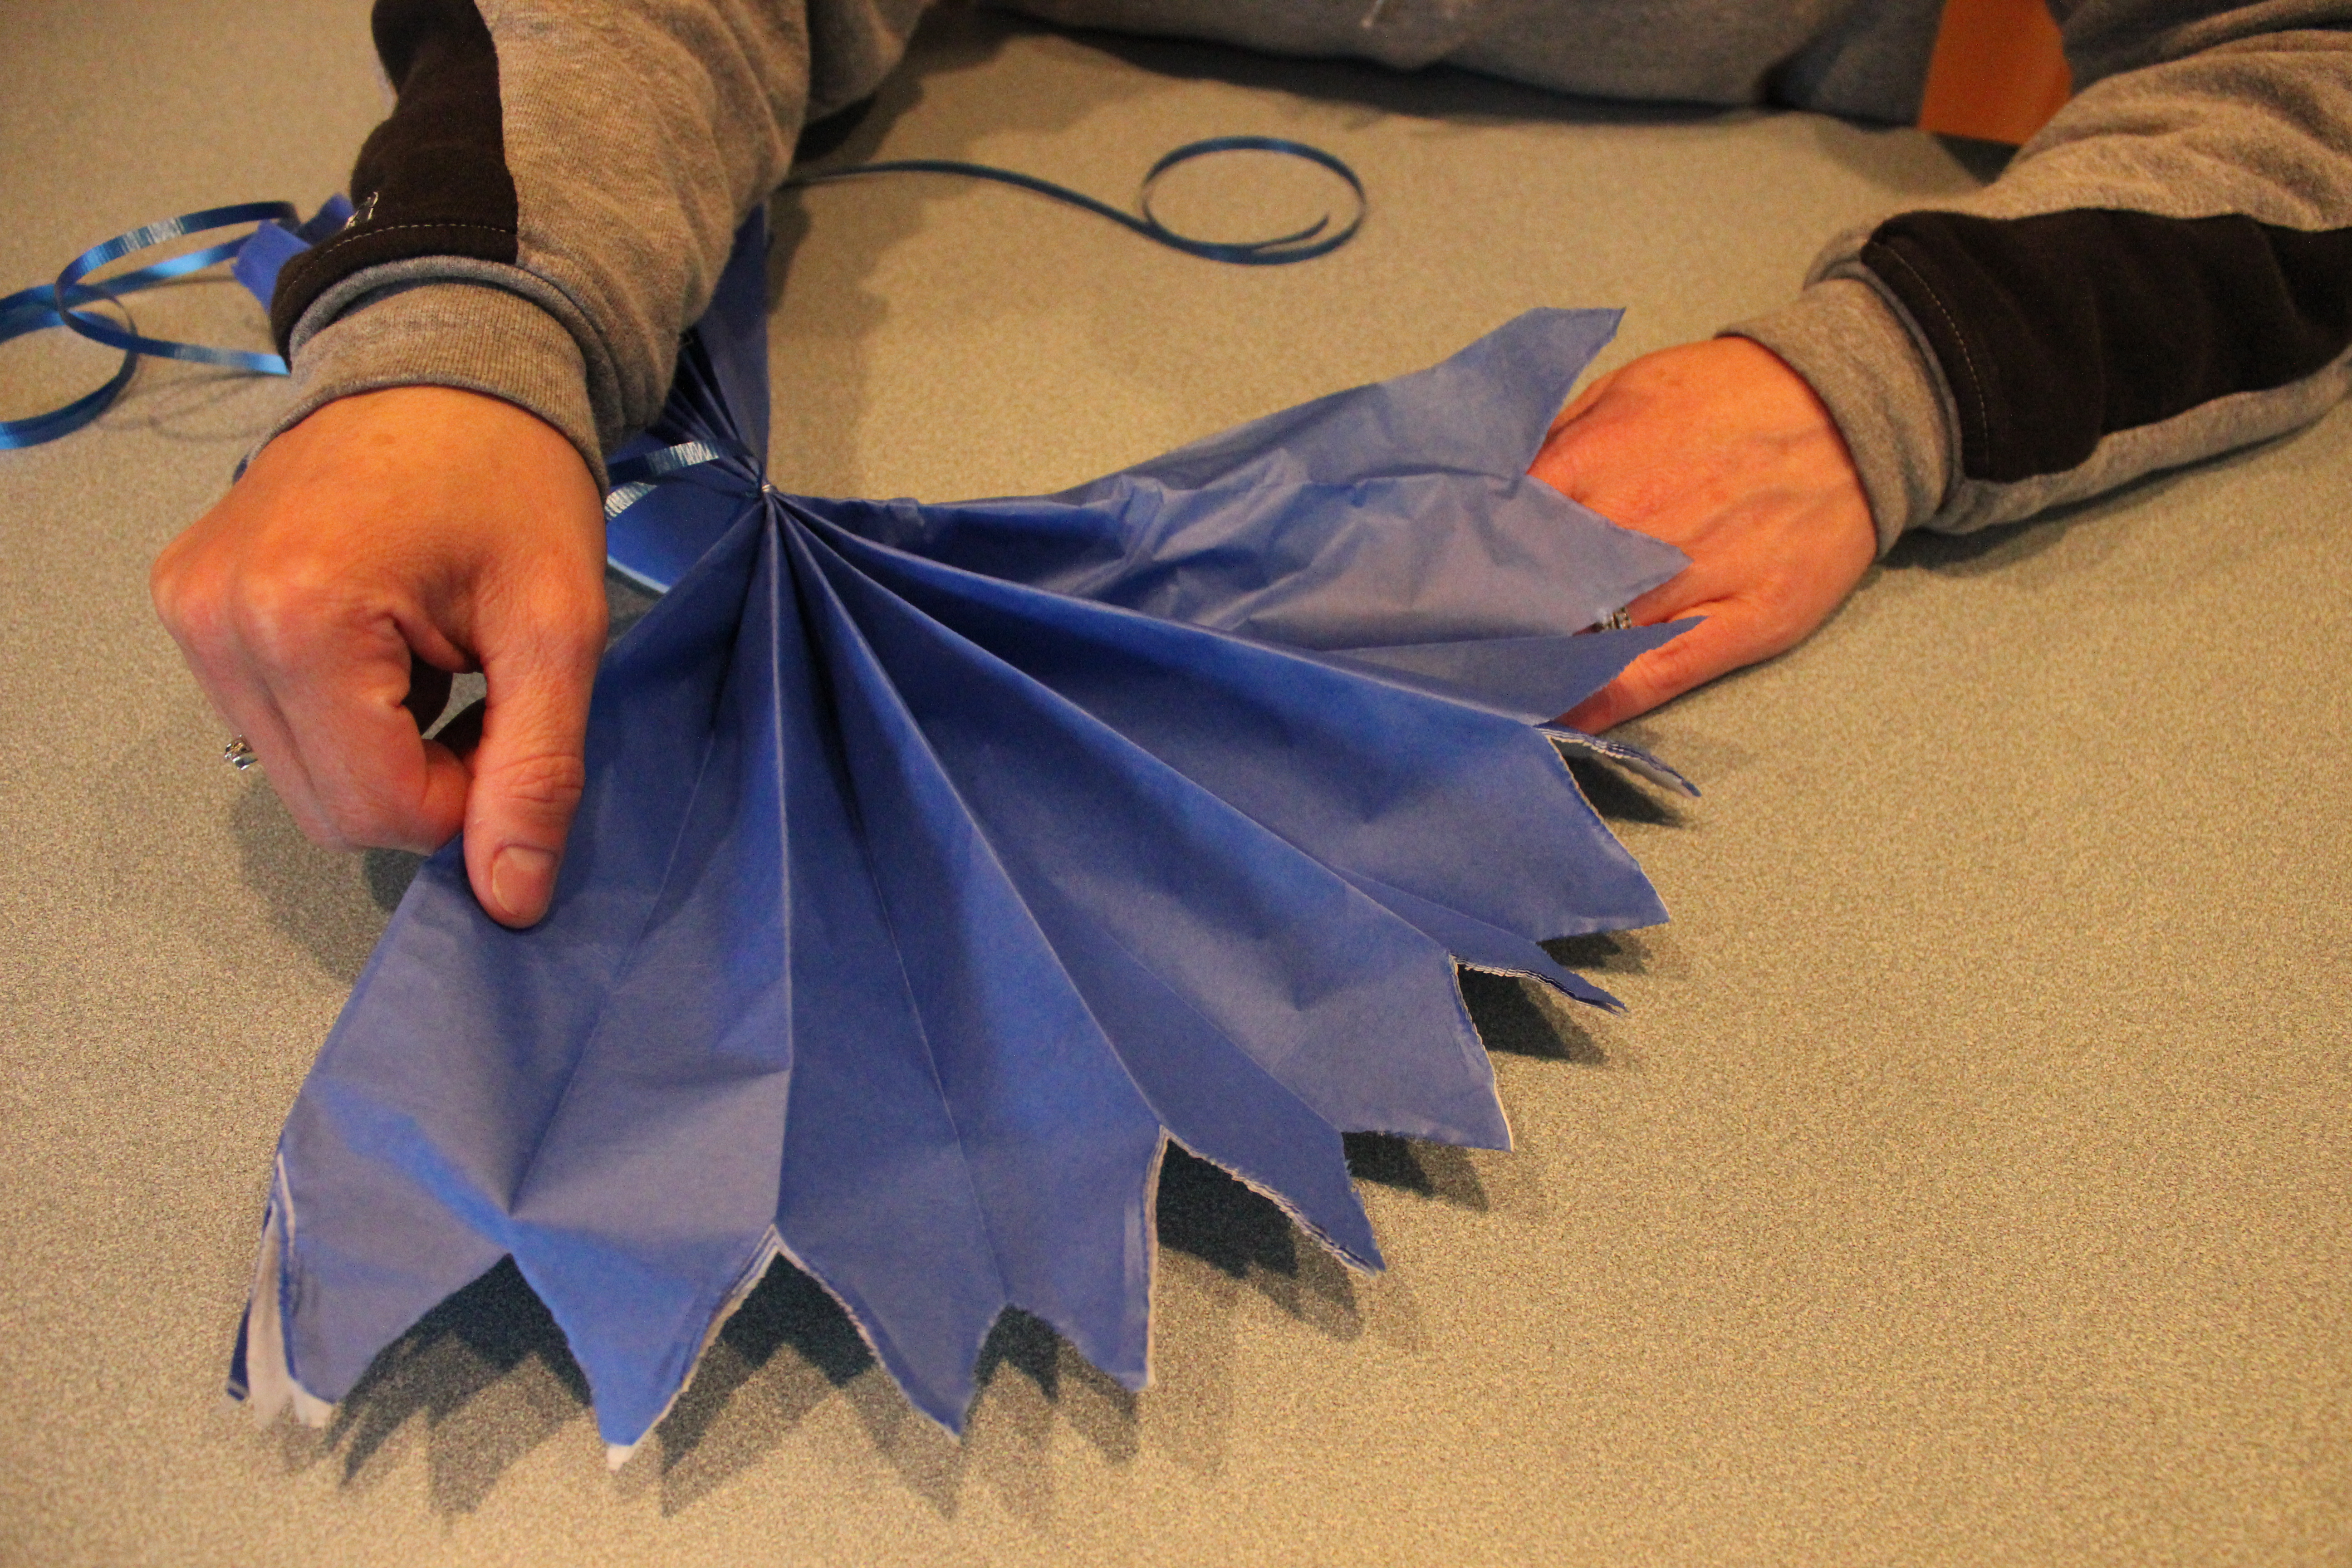

Step 7: Repeat on the other side so it looks like you have a ½ circle of fluffy Pom. Remember, you are working with tissue paper which is very thin and easily ripped. You need to be gentle. Every now and then, you will more than likely put a rip in the tissue paper. This is OK as you won’t be able to tell on the finished Pom.

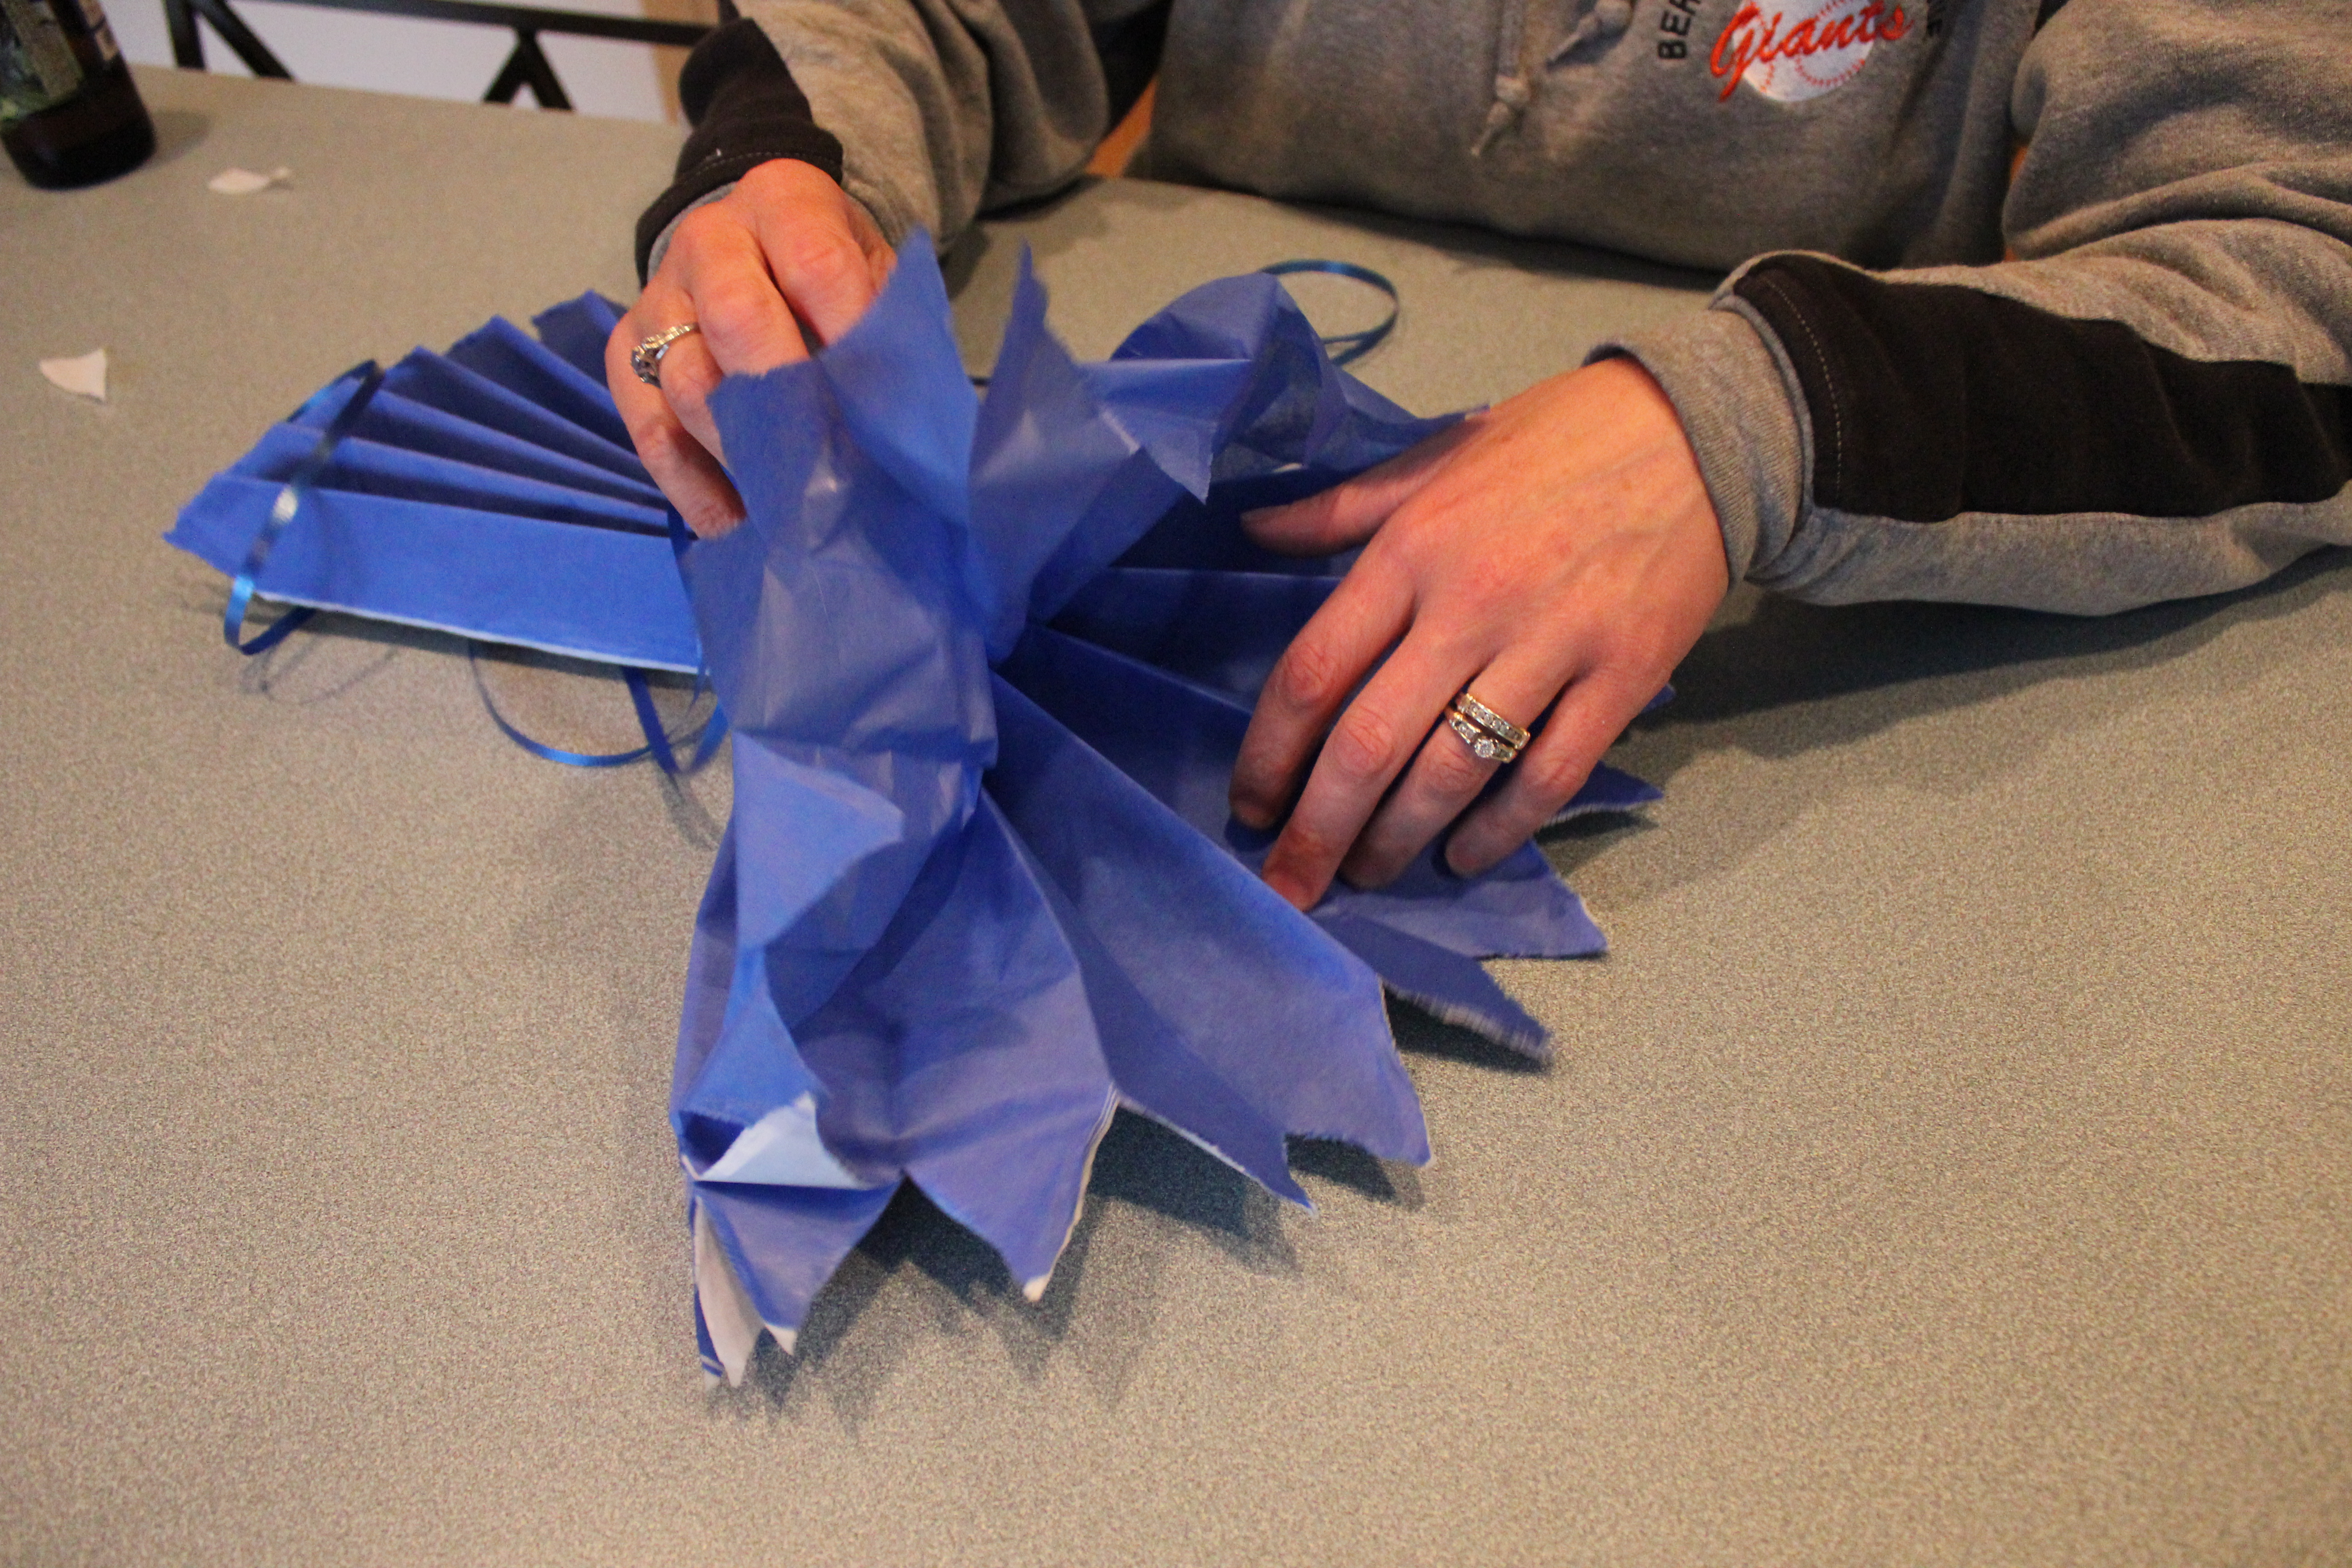
Step 8: Flip the Pom over and fluff the other side. Be careful that you don’t completely smash the first ½ you fluffed. At the very end, you can certainly do a final ‘fluff’ to even out the sides and make it as round as possible.

Step 9: Hang your Pom from wherever you are going to and do a final ‘fluff’ to separate the edges and get your final fullness in the sphere.
Step 10: Enjoy!
Because the color combinations are only limited by the colors of tissue paper, this project is very versatile for any event you may be hosting. We think this would be perfect for a Baby Shower, Baptism party or First Communion party!
Take time to try this easy DIY project for your next event or get together and let us know how your Poms come out. We’d love to hear from you!
Anne-Marie Dunn is the owner of www.BaptismalGownsPlus.com
Please feel free to visit our website or send us an e-mail at Support@BaptismalGownsPlus.com to let us know what you think.
